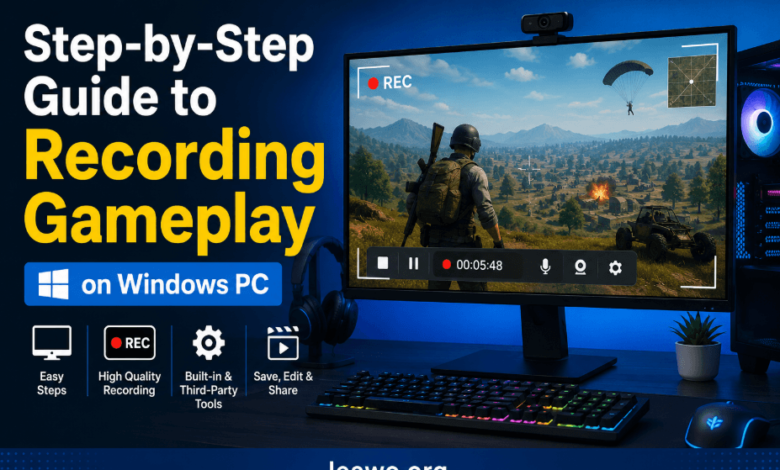
Summary: This guide covers the best ways to record gameplay on PC using built-in Windows tools, GPU software, and third-party apps — so you can capture every moment without hassle.
Introduction
Want to record your gameplay on a Windows PC? You are not alone. Millions of gamers share clips, build YouTube channels, and stream online every day.
The good news is that you do not need expensive software to get started. Windows has built-in tools that work great. You can also use your graphics card software or a free third-party app.
This guide will show you the best way to record gameplay on PC. We cover three easy methods. Each one suits a different type of gamer. Let’s dive in.
Quick Preview
- Xbox Game Bar — Built into Windows. Free and easy to use.
- GPU Software (Nvidia/AMD) — Best performance. Great for serious gamers.
- Third-Party Software — More features and flexibility.
Method 1: How to Record Gameplay with Built-in Tools
Windows 10 and 11 come with Xbox Game Bar. It is a free, built-in screen recorder. You do not need to install anything. It works with most PC games right away.
Step-by-Step Guide: Xbox Game Bar
- Open your game and start playing.
- Press Windows + G to open Xbox Game Bar.
- Click the Capture widget if it is not already open.
- Click the Record button (the circle icon) to start.
- Press Windows + Alt + R to stop the recording.
- Find your clip in the Videos > Captures folder.
Pros:
- Free and already on your PC
- Very simple to use
- Records in the background without interrupting gameplay
Cons:
- Cannot record the desktop or File Explorer
- Limited editing and settings options
- May not work with all games
Method 2: How to Record Gameplay Using Graphics Cards
If you have an Nvidia or AMD graphics card, you already have a powerful recording tool. These tools are designed for gaming. They record smoothly with very little FPS drop.
NVIDIA ShadowPlay (GeForce Experience)
- Download and open GeForce Experience from Nvidia’s website.
- Log in with a free Nvidia account.
- Press Alt + Z in-game to open the overlay.
- Click Record > Start to begin recording.
- Press Alt + F9 to stop. Your clip saves automatically.
AMD Radeon Software
- Open AMD Radeon Software on your PC.
- Go to the Streaming tab and enable ReLive.
- Launch your game. Press Ctrl + Shift + R to start recording.
- Press the same shortcut again to stop.
Pros:
- High quality recording with minimal performance impact
- Supports Instant Replay to save the last few minutes
- Great for high frame rate games
Cons:
- Requires a compatible Nvidia or AMD GPU
- Nvidia requires a free account login
- Fewer editing features compared to third-party tools
Method 3: How to Record Gameplay with Third-Party Software
Third-party tools give you the most control. They work on any PC regardless of your GPU. One great option is Leawo Free Screen Recorder.
There are many free screen recorders for PC, but Leawo stands out for its clean interface and zero cost. It records your full screen, a specific window, or a custom area.
Step-by-Step Guide: Leawo Free Screen Recorder
- Download and install Leawo Free Screen Recorder from the official website.
- Open the app and choose your recording area (full screen or custom).
- Set your audio source. You can record game sound and microphone together.
- Launch your game, then click the Record button in Leawo.
- Click Stop when done. The file saves automatically in MP4 format.
Pros:
- Completely free with no watermark
- Works on any Windows PC
- Records screen, webcam, and audio at the same time
Cons:
- Requires a separate download and install
- Less optimized for high-end gaming compared to GPU tools
See also: Why White Label PPC is a Game Changer for Agencies
Best Recording Settings for Smooth Gameplay
No matter which tool you use, good settings make a big difference. Here are four tips to get the best results.
1. Use 1080p at 60fps
This is the sweet spot for most gamers. It looks sharp and smooth. It also keeps file sizes manageable.
2. Set Bitrate Between 20–40 Mbps
A higher bitrate means better quality. Aim for 20 Mbps for casual recording. Use 40 Mbps if you plan to edit the footage later.
3. Record to an SSD
Always save recordings to an SSD, not an HDD. An SSD writes data much faster. This prevents dropped frames during recording.
4. Close Background Apps
Close browsers, Discord video, and other heavy apps before recording. This frees up CPU and RAM. Your game and recording will both run smoother.
Conclusion
Recording gameplay on a Windows PC is easier than ever. Xbox Game Bar is perfect if you want something quick and simple. GPU software like Nvidia ShadowPlay is ideal for high performance. And tools like Leawo Free Screen Recorder give you the most flexibility.
Pick the method that fits your setup and start recording today. Every great gaming channel started with a single clip.
FAQs
1. Does recording gameplay lower FPS?
It can, but usually only slightly. GPU-based tools like ShadowPlay have the smallest impact. Using an SSD and closing background apps also helps keep FPS stable.
2. Can I record gameplay and Discord audio together?
Yes. Most recording tools let you choose multiple audio sources. Select both your game audio and your system sound to capture Discord voice chat as well.
3. How long can I record gameplay on PC?
It depends on your storage space. Xbox Game Bar limits clips to four hours. Third-party tools like Leawo Free Screen Recorder have no time limit as long as you have disk space.
4. What file format is best for gameplay recording?
MP4 is the best choice for most users. It offers great quality at smaller file sizes. It is also widely supported by video editors and upload platforms like YouTube.
5. Where are gameplay recordings saved?
Xbox Game Bar saves clips to Videos > Captures. NVIDIA and AMD software have their own default folders. Third-party tools like Leawo let you choose your own save location.
6. How do I record gameplay with a facecam?
Use a tool that supports webcam overlay. Leawo Free Screen Recorder can capture your screen and webcam at the same time. Just enable the webcam option before you start recording.